Introduction
Polishing follows grinding and removes the deformed, scratched layer that grinding leaves behind. Done well, it restores the true microstructure: inclusions stay intact, brittle phases are not torn out, sharp edges remain sharp, porosity has clean edges, and the surface is flat enough to etch and image with confidence.

PACE diamond suspensions, alumina, colloidal silica, and matching pads cover the full polishing sequence from rough through final.
Every polishing step can be judged by the same set of effects.
Desirable effects
- Complete removal of the grinding-damage layer and prior scratch pattern
- True microstructure: intact inclusions and brittle phases, no smeared metal, no embedded abrasive
- Flat surface with sharp edges, no rounding of porosity or specimen edges
- Minimal relief between phases of different hardness
Undesirable effects
- Residual scratches from a coarser step (carry-over or skipped grit)
- Smeared, plastically deformed surface that hides the real microstructure
- Pull-out of inclusions, second-phase particles, or grains
- Edge rounding and excessive relief between hard and soft phases
- Embedded abrasive, comet tails, or staining
The goal of every polishing stage is to maximize the desirable effects while minimizing the undesirable ones.
Polishing happens in two distinct stages, with a third group of techniques for materials that resist conventional polishing. Rough polishing removes the remaining grinding damage and reveals the microstructure. Final polishing cleans up the surface and prepares it for etching. Alternative techniques (electrolytic, attack, and vibratory polishing) handle the materials that the standard sequence cannot.
Polishing Sequence Planning
Before the sample reaches the polishing wheel, two things matter: where grinding ended and what the final analysis needs. Both shape the polishing sequence.
Match the first polishing step to the last grinding step
Each polishing step has to remove the scratch pattern from the step before it. If grinding stopped at P1200 SiC paper (roughly 15 μm), a 9 μm diamond stage is a reasonable starting point. If grinding stopped at P800 (roughly 22 μm), the first polish needs to be coarser or longer. Skipping grit sizes saves no time, because the next step takes longer to clear the residual scratches. See the Grinding Techniques guide for how the previous stage's damage layer is set up.
Check progress under the microscope, not by the clock
Polishing times in any procedure are starting points. The real test is the surface itself. Stop a step when the previous scratch pattern is gone, not when a timer reaches a number. Over-polishing is the most common operator error: it rounds edges, pulls inclusions, and produces relief between phases of different hardness.
Plan for the analysis you actually need
Routine optical microscopy and etching rarely require sub-micron polishing past 1 μm diamond plus a short oxide step. EBSD, SIMS, AFM, and high-magnification SEM imaging do. Polish to the finish your analysis requires, no further.
Quick checks before polishing
- Has the sample been cleaned (ultrasonic, water rinse) to remove all loose grinding swarf?
- Is the first diamond size matched to the last grinding step?
- Are pads and suspensions matched to each other? (Diamond on woven low-nap pads; oxide on higher-nap pads.)
- Is each pad dedicated to one abrasive size to prevent contamination?
- For multi-phase or coated samples, is the planned sequence biased toward flatness rather than aggressive removal?
Two Polishing Stages
Rough and final polishing serve different goals and use different consumables. Understanding the split prevents a common mistake: treating final polishing as a longer version of rough polishing.
| Rough Polishing | Final Polishing | |
|---|---|---|
| Primary goal | Remove grinding-damage layer and restore true microstructure | Clean up the surface and prepare it for etching |
| Abrasive sizes | 15 μm down to 1 μm | 1 μm down to 0.02 μm |
| Typical abrasives | Diamond (mono or polycrystalline), alumina slurry | Polycrystalline alumina, colloidal silica, calcined alumina |
| Pad type | Low-nap or napless woven pads, urethane-coated, or lapping films for flatness | Higher-nap or flocked pads, or low-nap with foam backing where flatness matters |
| Pressure | Moderate to firm; the work is material removal | Light; the work is surface refinement |
| When to stop | Previous scratch pattern is fully removed and microstructure is intact under the microscope | Surface is mirror-like, ready to etch; do not over-run, relief increases with time |
The rest of this guide is split into self-contained tracks. Read Rough Polishing for the damage-removal step, Final Polishing for the surface-finish step, and Alternative Techniques when the standard stages need help. Universal Best Practices and Troubleshooting apply to both.
Rough Polishing
Rough polishing is the most critical step in metallographic preparation. After this stage, the true microstructure should be visible: inclusions, brittle phases, voids, and porosity all in place, with no smeared metal or embedded abrasive carried over from grinding. If the microstructure is not right at the end of rough polishing, no amount of final polishing will fix it.

PACE rough polishing line: diamond suspensions, diamond pastes, and matching low-nap pads.
Rough polishing abrasives
Rough polishing abrasives range from 15 μm down to 1 μm. The two families are diamond and alumina: diamond dominates for harder materials, alumina is common for softer metals and is significantly less expensive.
- Polycrystalline diamond: spherical, nodular particles built from many small crystallites. Particles fracture during cutting and continuously expose fresh cutting edges. Higher cut rates and a better surface finish than monocrystalline on harder materials.
- Monocrystalline diamond: blocky single-crystal particles with uniform cutting geometry. Consistent scratch pattern, less subsurface deformation. Preferred for soft and ductile metals, where smearing and embedment are the main risks.
- Alumina slurries (for soft metals): hard alpha alumina at lower cost than diamond, common for soft-metal rough polishing. PACE's polycrystalline alumina is deagglomerated for a tighter particle distribution and less random scratching.

Polycrystalline diamond suspension. Self-sharpening fracture behavior, higher cut rates on harder materials.

Monocrystalline diamond suspension. Uniform scratch pattern, lower subsurface deformation. Preferred for soft and ductile metals.

Diamond paste. Grease-based, for manual polishing and selective application.
Rough polishing sequence
A standard sequence runs from a coarse diamond stage that clears the last grinding-paper scratches down to 1 μm. PACE practice differs from older textbook sequences in one important way: the 6 μm step is used for harder materials only. For soft, ductile metals (aluminum, copper, brass, bronze, and similar Class 1 materials), the 6 μm step is skipped, because the extra step does more smearing damage than it removes.
| Material class | Rough polishing sequence | Notes |
|---|---|---|
| Soft, ductile metals (Al, Cu, brass, bronze) | P500 ALO pre-step, then 9 μm → 3 μm → 1 μm diamond | Skip 6 μm. Monocrystalline diamond preferred. PACE Class 1 recipe. |
| Medium-hard, ductile metals | 9 μm → 3 μm → 1 μm diamond | Mono or polycrystalline diamond both work. |
| Hardened steels, tool steels, cast iron, titanium | 9 μm → 6 μm → 3 μm → 1 μm diamond | Include 6 μm. Polycrystalline diamond preferred for cut rate. |
| Stainless steels, work-hardening alloys | 9 μm → 6 μm → 3 μm → 1 μm diamond | Longer times at each step; austenitic grades work-harden. |
| Engineered ceramics | Coarse diamond grinding, then diamond + colloidal silica CMP | Diamond alone leaves subsurface damage. See CMP for ceramics below. |
Rough polishing pads
Rough polishing uses low-nap or napless woven pads. They support the abrasive while keeping the specimen flat. Properties that matter: fiber hardness and density, weave type, compressibility, porosity, and how well the pad wets with the chosen suspension.
| Pad | Description | Typical use |
|---|---|---|
| POLYPAD | Tightly woven, large-weave polyester (similar to sailcloth). Durable, long-life. | Coarse rough polish with 6, 9, and 15 μm diamond. |
| TEXPAN | Fibrous matrix coated and impregnated with urethane polymer. Porous structure holds suspension. | Intermediate rough polish with 1, 3, 6, and 9 μm diamond. Also used for ceramic CMP. |
| DACRON II | Higher-nap woven polyester pad. Compliant to the specimen surface. | Intermediate polish with 1 to 15 μm diamond on metals. |
| NYPAD | Low-nap silk pad. Tight weave for flatness. | Intermediate polish of harder metals and alloys with mid-size diamond. |
| GOLDPAD | Hybrid low-nap woven pad. Consistent removal across the lower end of the rough range. | 1 to 9 μm diamond when flatness matters. |
| CERMESH | Metal mesh pad for semi-fixed abrasive lapping. | Heavy initial removal on hard materials; bridges grinding to rough polishing. |
Lapping films as an alternative
For applications where flatness is non-negotiable (PCB cross-sections, optical fiber ferrules, hard/soft phase contrasts), alumina or diamond lapping films can replace pads at the rough stage. Because the abrasive is bonded to a polyester backing, lapping films have much lower compressibility than pads and produce flatter surfaces with less relief. The trade-off is conformability: stacking the film on a pad (or a rubber pad) restores some compliance for irregular specimens.
Automated rough polishing parameters
For automated disk-on-disk polishing, the relative velocity between the specimen holder and the platen is the dominant parameter for damage control.
- Metals and damage-sensitive materials: run the head and base in the same direction at approximately the same RPM (for example, 100 RPM head and 100 RPM base). Low relative velocity, low damage. Removal rates are modest, but the microstructure stays intact.
- Hard, tough engineered ceramics (silicon nitride, zirconia, dense alumina): use a much larger relative velocity difference and higher pad pressure. Counter to intuition for metals, brittle ceramics polish best under more aggressive CMP conditions.
Complementary rotation (head and base in the same direction at matched speeds) is the PACE default for damage-sensitive materials. It is also the same "100/100, same direction" rule that resolves scratches, smearing, comet tails, and pull-out in the troubleshooting table.
Chemical mechanical polishing (CMP) for ceramics
Standard diamond polishing leaves subsurface damage on hard ceramics that further diamond stages cannot remove. The damage propagates from one step to the next. The fix is CMP: combine a mechanical abrasive (diamond) with a chemically active suspension (colloidal silica at high pH), so the silica electrochemically attacks the ceramic surface and the diamond removes the reacted layer.
A working CMP sequence for silicon nitride or zirconia: rough grind to 30 μm, then polish with a 6 μm diamond and colloidal silica mixture, then finish with colloidal silica alone, about five minutes per step. The result is significantly less surface and subsurface damage than a long diamond-only sequence produces.
Friction increases the chemical contribution. Higher pad pressure and higher velocity raise temperature at the polish zone and accelerate the chemical attack. Rinse the pad with distilled water for the last 10 to 15 seconds of the step to mechanically lift the reacted layer.
Recommended PACE grinder-polishers

NANO Series, Manual Grinder-Polishers
Variable-speed manual polishing in single, double, and large-wheel configurations. The workhorse for labs that run varied work at moderate volume.

FEMTO Series, Semi-Auto Heads
Automated polishing heads that mount onto NANO bases. Programmed force, time, and direction for repeatable rough polishing.
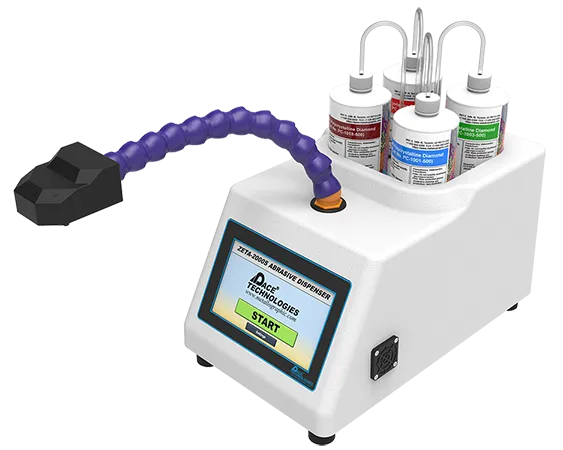
ZETA-2000S, Automated Abrasive Dispenser
Programmable suspension dosing for hands-off, reproducible rough polishing on a NANO/FEMTO setup.
Dr. Donald Zipperian demonstrates automated grinding and rough polishing on the PACE NANO-1000S base with a FEMTO-1100S semi-auto head.
Final Polishing
If rough polishing was done well, final polishing has a short job: clean up the surface and prepare it for etching. If rough polishing was not done well, no amount of final polishing will restore the true microstructure. Final polishing is where you finish, not where you fix problems.
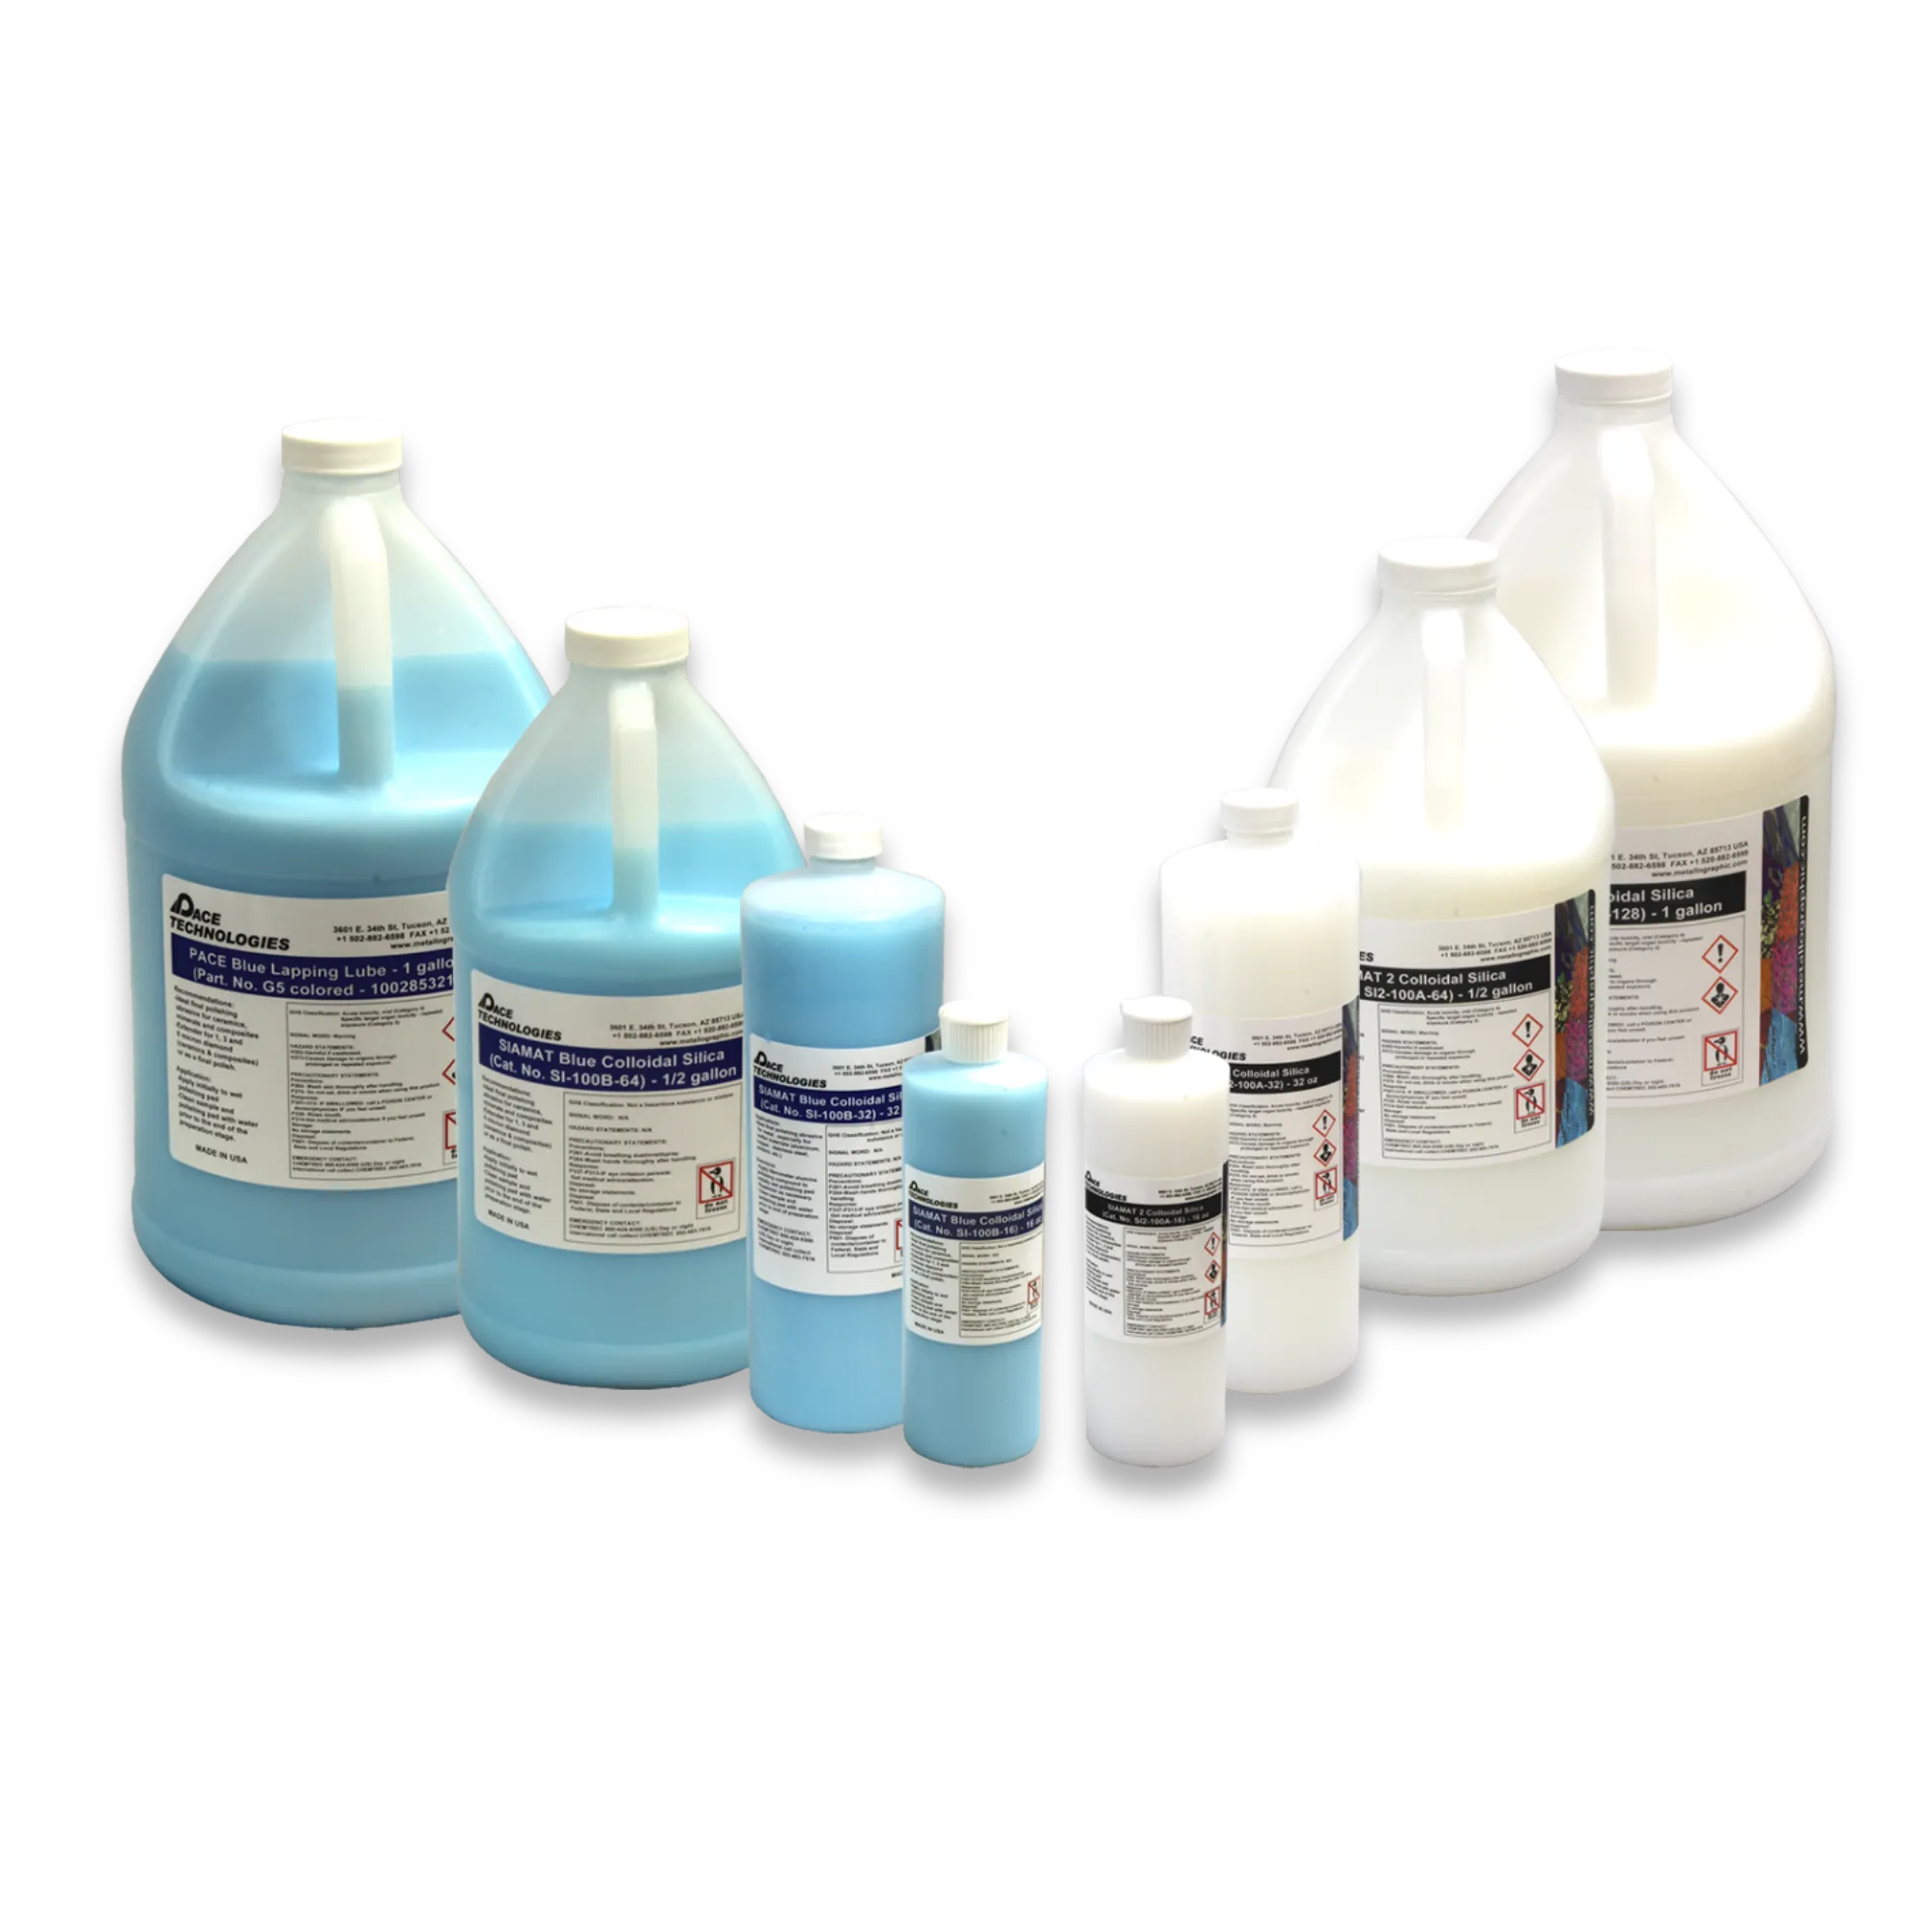
PACE SIAMAT colloidal silica, the most common final polishing abrasive for metals, composites, and ceramics.
Final polishing abrasives
Five abrasive families are used for final polishing: polycrystalline alumina, calcined alumina, levigated alumina, colloidal silica, and the specialty oxides (cerium oxide for glass, iron oxide rouge for soft metals). Polycrystalline alumina and colloidal silica handle the great majority of metallographic work.
| Abrasive | Particle size | Crystal structure | Use |
|---|---|---|---|
| Polycrystalline alumina | 0.05 to 0.25 μm | Polycrystalline alpha alumina | Premium final abrasive for metals. Harder and tighter sized than calcined; less random scratching. |
| Calcined alumina | 0.5 to 15 μm | Monocrystalline alpha alumina (platey) | Most common final alumina by volume. Powders and slurries. Lower cost than polycrystalline. |
| Levigated alumina | under 1 μm | Monocrystalline gamma or alpha | Traditional Linde A (0.30 μm), Linde B (0.05 μm), Linde C (1 μm). Still common in legacy procedures. |
| Colloidal silica | 20 to 70 nm | Amorphous silica at high pH (greater than 9.5) | Chemical mechanical action on ceramics; mechanical polish on metals and microelectronics. Mirror finishes, minimal relief. |
| Cerium oxide | under 1 μm | Crystalline CeO₂ | Glass and some optical ceramics. |
Polycrystalline alumina, the modern default
Polycrystalline alumina is manufactured by a seeded gel process that produces tighter particle-size distributions and harder alpha alumina crystals than traditional calcined products. The result is fewer random scratches, higher cutting rates, and a more uniform surface finish than a standard 0.05 μm gamma alumina powder, which often aggregates into 5 μm clumps that scratch soft metals.
For application, wet the polishing cloth with the polycrystalline alumina slurry, then drip or spray more suspension during the cycle. Common pads: MICROPAD, MICROPAD 2, ATLANTIS, TRICOTE, NAPPAD, and FELT PAD.
Polycrystalline alumina tip: these particles electrostatically coat the specimen and leave what looks like a matte film after rinsing. It is not damage. Wipe gently with a cotton ball and a cleaning solution (PACE ULTRACLEAN 2 works well) and the film comes right off.
Calcined alumina, the cost-effective alternative
Calcined alumina has been the workhorse final-polish abrasive for decades. Particles have a plate-like shape and come in alpha (harder) or gamma (softer) crystal structures. Sub-micron calcined products are typically jet-milled to break up agglomerates. Applied on the same pads as polycrystalline alumina, plus the softer MOLTEC 2 (canvas) and FELT PAD (1/8 inch thick felt) for less critical work.
Colloidal silica
Colloidal silica is the most versatile final-polish abrasive. It functions as both a chemical agent and a mechanical abrasive: on glass, ceramics, and mineral phases it reacts electrochemically with the surface and the cloth lifts the reacted layer (CMP). On metals, composites, and microelectronic substrates it polishes mechanically and produces mirror finishes with minimal relief.
| Property | SIAMAT | SIAMAT 2 |
|---|---|---|
| Particle size | 50 to 70 nm | 20 to 40 nm |
| pH | 9.5 to 10.0 | 9.5 to 10.0 |
| Concentration | 50% solids | 40% solids |
| Primary use | Ceramics and glass; CMP with diamond; BLACKCHEM 2 pad for chemical action | Metals and microelectronic materials on a MICROPAD or BLACKCHEM 2 pad |
Colloidal silica handling rules. Colloidal silica crystallizes when it dries out, producing much larger abrasive particles that scratch instead of polish. Two consequences:
- Rinse the polishing pad with distilled water for the last 15 to 30 seconds of the cycle, then rinse the specimen immediately. This mechanically removes the reacted layer and unreacted silica before either can crystallize.
- If silica does crystallize on the specimen, re-polish, or clean with a 1:1 ammonia / hydrogen peroxide solution. Note: that solution etches copper and copper alloys, so use a different cleaner for those.
Keep bottle lids tight. Dried silica around the lid threads is a common contamination source.
Final polishing pads

PACE final-polish pads cover the full range from low-nap flatness control (ATLANTIS, TRICOTE) to high-nap scratch removal (MICROPAD, NAPPAD).
| Pad | Description | Typical use |
|---|---|---|
| MICROPAD / MICROPAD 2 | High-napped, flocked pad. MICROPAD 2 carries a stiffer laminate backing. | Final polish with alumina or colloidal silica. Keep times short; high nap rounds edges. |
| ATLANTIS | Woven pad with resilient foam backing. Conforms like a high-nap pad but stays flatter. | Final polish on multi-phase materials, coatings, composites. High-nap performance, low-nap flatness. |
| TRICOTE | Tight-napped pad. Performance sits between MICROPAD and ATLANTIS. | Final polish on steels and other ferrous metals. |
| NAPPAD | Very high-nap pad with a soft, compliant surface. | Soft metals and polymers, where pull-out is the risk and minor relief is acceptable. |
| MOLTEC 2 | Soft canvas pad. | Calcined alumina up to 5 μm on metals when edge retention is not critical. |
| FELT PAD | 1/8 inch thick felt. | Large samples or glass with colloidal silica or alumina slurries. |
| BLACKCHEM 2 | Porometric polymer pad, rubber-like. Generates heat at the polish zone. | CMP polish of glass, ceramics, and microelectronics with colloidal silica. |
For the full PACE polishing pad lineup with sizes, adhesives, and stock, see the Polishing Pads page.
Historical note: in the 1920s and 1930s, "kitten-ear" broadcloth was a favored final polishing cloth. When fashion changed and the cloth disappeared, metallographers worked with textile manufacturers to develop replacements. That is how the modern catalog of specialized polishing pads came to exist. Kitten-ear style flocked cloths are still made for final polishing of soft metals where scratch removal is the hardest problem.
Alternative Polishing Techniques
Some materials never produce a clean microstructure with conventional mechanical polishing. Extremely soft metals smear at any pressure. Heat-sensitive metals recrystallize. Friable abrasives embed in the surface. Three techniques handle these cases: electrolytic polishing, attack polishing, and vibratory polishing.
Electrolytic polishing
Electrolytic polishing electrochemically corrodes the specimen in a controlled fashion: the sample is the anode in a flow cell, and material leaves the surface ion by ion. The result is a deformation-free surface with no mechanical artifacts. The technique is covered in detail in the Etching Procedures guide, alongside electrolytic etching.
Attack polishing
Attack polishing adds a controlled etching step between grinding or polishing steps to dissolve embedded abrasive and the smeared surface layer. The classic example is tin: SiC abrasives fracture and embed in tin during grinding. Etching the sample lightly between grit sizes (for example, 2% Nital between SiC papers) dissolves the embedded fragments before they carry into the next stage.
The etch is more aggressive than a typical metallographic etch. The goal is not to reveal microstructure, it is to dissolve the contaminated surface layer. Attack polishing also covers cases where a dilute etchant is added to the polishing suspension itself, so mechanical removal and chemical attack proceed simultaneously.
Vibratory polishing
Vibratory polishing uses a spring-and-motor mechanism that vibrates the polishing bowl while the angled spring slowly rotates the specimens around it. It is mechanically gentle: deformation runs much lower than disk polishing, which makes vibratory the standard for EBSD preparation and for any application where subsurface damage matters more than time. The trade-off is speed. Vibratory cycles run from hours to overnight.
Dr. Donald Zipperian demonstrates vibratory polishing on the PACE GIGA-S, including bowl selection, suspension choice, and parameter setup for EBSD-quality finishes.

Recommended Equipment: GIGA-S Vibratory Polisher
Interchangeable 9 inch and 12 inch bowls, variable frequency and amplitude, batch processing of multiple samples. The standard PACE choice for EBSD preparation and subsurface deformation removal.
View GIGA-S Vibratory Polisher →Material-Specific Polishing
The principles above adapt to material class. The notes below collect Don Zipperian's PACE-tested adjustments that override the generic "metals get 6, 3, 1 μm diamond" advice in older textbooks.
Soft, ductile metals (Class 1: aluminum, copper, brass, bronze, soft steels)
- Skip the 6 μm diamond step. The extra stage causes more smearing damage than it removes.
- Use monocrystalline diamond for less subsurface deformation.
- Include a P500 alumina (ALO) pre-step before diamond for aluminum, copper, brass, and bronze.
- Use polycrystalline alumina (not calcined gamma alumina) for the final step. Gamma alumina aggregates and scratches soft metals.
- Attack polishing with a dilute etchant in the suspension is often the only way to clear the smeared layer.
Hardened steels and tool steels (Class 8)
- Full diamond sequence: 9 → 6 → 3 → 1 μm. The 6 μm step is needed here.
- Polycrystalline diamond preferred for cut rate.
- Final polish: polycrystalline alumina or colloidal silica on MICROPAD or TRICOTE.
Stainless steels and work-hardening alloys (austenitic, nickel-base)
- Mechanical polishing alone leaves a deformation layer that subsequent mechanical steps cannot remove.
- Extended vibratory polishing with colloidal silica usually clears the deformed layer. For EBSD, vibratory finishing is essentially mandatory.
- Electrolytic or attack polishing handles cases where vibratory time is not available.
Titanium, cast iron, thermal-spray coatings
- Titanium: long times at each diamond step; the oxide film reforms continuously. Final polish with colloidal silica on a low-nap pad to maintain flatness.
- Cast iron: extended care at rough polishing to retain graphite flakes and nodules. Low pressures, woven pads, polycrystalline diamond. Final with colloidal silica or polycrystalline alumina.
- Thermal-spray coatings: prioritize flatness across the coating-substrate interface. Use lapping films or ATLANTIS pad, low-nap final, no high-nap pads.
Engineered ceramics (Class 10, 11)
- CMP is the only sequence that consistently clears subsurface damage. See CMP for ceramics in the rough polishing section.
- Hard, tough ceramics polish under high-pressure, high-velocity CMP conditions, counter to the gentle approach used for metals.
- BLACKCHEM 2 pad concentrates frictional heat at the polish zone and accelerates the chemical action.
Multi-phase materials and composites
- Use harder, lower-nap pads to keep all phases in the same plane.
- Keep total polishing time short. Differential removal rates between phases convert time into relief.
- ATLANTIS pad is a strong compromise: high-nap conformability with low-nap flatness.
- Vibratory polishing with colloidal silica often levels the final relief.
Universal Best Practices
These habits apply to every polishing step, rough or final.
Before the step
- Inspect the surface from the previous step under the microscope. Decide whether to polish further at the current size or move on.
- Clean the sample ultrasonically between every step. The single most common cause of "mystery scratches" is carry-over of a coarser abrasive.
- Dedicate each pad to one abrasive size. Cross-contamination ruins fine pads instantly.
- Wet the pad with the suspension before applying the specimen.
During the step
- Match base and head speeds, same direction, for damage-sensitive materials (the 100/100 rule).
- Drip or spray suspension continuously. A dry pad polishes nothing and damages the specimen.
- Use light force at the final polishing stage; the work is refinement, not removal.
- Inspect under the microscope between steps, not after the whole sequence has finished.
After the step
- Rinse the specimen immediately. Colloidal silica must come off before it crystallizes.
- Inspect for residual scratches from the previous size before advancing.
- Wipe off any matte alumina film with a cotton ball and a mild cleaning solution.
- Document any parameter that worked (force, time, suspension, pad). The next operator should not need to rediscover it.
Pad and equipment care
- Store unused pads flat and dry.
- Rinse used pads thoroughly to prevent abrasive crystallization in the fibers.
- Check platen runout periodically (PACE specs 2.5 μm for an 8 inch plate). An out-of-flat platen prints its unevenness onto the specimen.
- Replace pads when they glaze, embed contaminants, or no longer wet uniformly.
Troubleshooting
Almost every polishing artifact can be traced to one of four causes: a carry-over from the previous step, the wrong pad, the wrong force, or too much time. The table below is adapted from Don Zipperian's PACE handbook and covers the artifacts that show up most often.
| Symptom | Common causes | Actions |
|---|---|---|
| Scratches |
|
|
| Smearing (microstructure hidden) |
|
|
| Comet tails |
|
|
| Relief between phases |
|
|
| Embedded abrasive |
|
|
| Edge rounding |
|
|
| Pull-out |
|
|
| Gaps (resin to specimen) |
|
|
| False porosity (rounded pore edges) |
|
|
| Matte film on specimen |
|
|
| Crystallized colloidal silica on specimen |
|
|
Frequently Asked Questions
Do I need the 6 μm diamond step?
For harder materials (hardened steels, tool steels, cast iron, stainless steels, titanium, engineered ceramics): yes. The 6 μm step is the bridge between coarse and fine diamond, and skipping it forces the 3 μm stage to do more work than it should. For soft, ductile metals (aluminum, copper, brass, bronze, and similar Class 1 materials): no. The extra stage smears more material than it removes. PACE's standard Class 1 recipe goes 9 μm to 3 μm to 1 μm diamond, with no 6 μm step.
Monocrystalline or polycrystalline diamond, which one?
Polycrystalline diamond fractures during cutting and exposes fresh edges, so it cuts faster and leaves a better finish on harder materials. Monocrystalline diamond has a uniform cutting geometry and produces less subsurface deformation, which makes it the better choice for soft and ductile metals (aluminum, copper, lead, soft steels). Use polycrystalline for hardened steels, tool steels, cast iron, and ceramics. Use monocrystalline for soft metals and for the final diamond stage on most materials.
Can I use the same pad for different materials?
Generally no. Pads pick up abrasive and microscopic specimen debris during polishing and carry those contaminants to the next specimen. A pad used on hardened steel that is then used on aluminum will embed steel particles and abrasive into the aluminum surface, where they show up as bright spots under the microscope. Keep separate pads per material class (ferrous, non-ferrous, ceramics), label them, and store them clean and dry. For high-contamination-risk applications (semiconductor, biomedical), use dedicated single-material pads. The cost of pads is trivial compared to a contaminated sample set.
How long should I polish at each step?
Until the scratch pattern from the previous step is fully removed, and no longer. Check under a microscope between steps. Fixed times in any procedure are starting points, not targets. Over-polishing is the most common operator error: it rounds edges, pulls inclusions, and creates relief between phases of different hardness. Final polishing in particular should be short, especially on multi-phase materials.
When should I use vibratory polishing?
Whenever subsurface deformation matters more than time. The two most common cases: EBSD preparation (where any deformation degrades the diffraction pattern), and work-hardening alloys like austenitic stainless steels and nickel-base superalloys (where mechanical polishing alone leaves a deformed layer that further mechanical steps cannot remove). Vibratory polishing with colloidal silica on a GIGA-S clears that layer. Cycles run from hours to overnight, but the surface quality is unmatched by disk polishing.
Why is my polished surface dull instead of mirror-like?
A dull final surface almost always means the polish has not fully removed the scratches from the previous step. Common causes: a step was skipped in the abrasive sequence; insufficient time at rough polishing (3 μm diamond does more work than most people expect); over-polishing into smearing on soft metals; or coarse-abrasive contamination preventing the fine abrasive from doing its job. Check under the microscope between stages. If 3 μm scratches are still visible, no amount of 1 μm or colloidal silica will produce a mirror. Drop back to the previous step for another minute, clean thoroughly, then advance. On soft metals specifically, switch to monocrystalline diamond for the final step to reduce smearing.
Why does my colloidal silica leave a hazy film on the sample?
Colloidal silica crystallizes when it dries on the surface. The crystallized particles are much larger than the original 20 to 70 nm and behave as scratching abrasives instead of polishing ones. Rinse the polishing pad with distilled water for the last 15 to 30 seconds of the cycle and rinse the specimen immediately afterward. If the haze is already on the surface, repolish, or clean with a 1:1 ammonia / hydrogen peroxide solution. That cleaner etches copper and copper alloys, so use a different cleaner for those.
Polycrystalline alumina left a matte film. Did I do something wrong?
No. Polycrystalline alumina particles electrostatically coat the specimen surface and look like a matte film after rinsing. The polish underneath is fine. Wipe gently with a cotton ball and a cleaning solution (PACE ULTRACLEAN 2, or soapy water), and the film comes off without affecting the polish.
Why do ceramic samples still show scratches after a long diamond polish?
Diamond alone cannot clear subsurface damage on hard ceramics. Each diamond step propagates the existing damage rather than removing it. The fix is chemical mechanical polishing: combine diamond with colloidal silica at high pH on a BLACKCHEM 2 pad. The silica chemically attacks the surface, the diamond removes the reacted layer, and the cycle repeats. For hard, tough ceramics like silicon nitride and zirconia, run CMP at high speed and high load. The combination produces clean microstructures that diamond-only sequences cannot.
What's Next: Etching
With a clean, true microstructure on the polished surface, the next step is usually etching. Etching reveals grain boundaries, phases, and constituents by chemically or electrolytically attacking the surface at different rates depending on local composition and crystallography. A good polish gives the etchant a uniform surface to work on. A bad polish gives the etchant pre-existing artifacts to amplify.